Tag Archives: ruby

Installing Ruby 2.X on Intel macOS Monterey (12.6)

In this guide, we’ll be using rvm & homebrew to install Ruby 2.X on our Intel Mac. The key is to specify the location of openssl.

First, make sure you have Xcode Command Line Tools installed on your mac. You can install it with

        xcode-select --install

Then install openssl (v1.1):

        brew install openssl@1.1

To install Ruby on my Mac, I’ve had to specify the openssl directory when compiling Ruby. Make sure to replace “2.7.8” with your target Ruby version.

        rvm install 2.7.8 --with-openssl-dir=`brew --prefix openssl@1.1`

You can set this version of Ruby as your default version with rvm:

        rvm use --default 2.7.8

That’s it! Installing older versions of Ruby isn’t too tough.

Optimizing for stable tools that don’t create perpetual work

Time is an incredibly important asset.

I come from a Ruby on Rails background. The progress of Rails updates & JS frameworks has been amazing & constant. Each new Rails patch brings with it some work to stay current. It’s not Rails’s fault since there are always new features or security issues that arise. Having a well maintained framework, such as Rails, is a huge boon for the community.

With any programmer tool, you generally want to be on the current stable release (for a variety of reasons including security & bug fixes). The issue is that upgrading to the latest stable version creates a never ending stream of (hopefully small) work.

Even if you went without a framework (Rails, Django, etc.), your server is running on a suite of tools. You’ll need to keep your OS (even LTS) and most likely nginx up to date.

Perhaps you want to outsource server maintenance, so you’re using Heroku. You’ll have to keep your configs compliant with the Heroku deployment framework & best practices.

What I’m getting at is that there are so many incredible tools available to developers today. Oftentimes, these tools are free and constantly get better & faster over time.

I’m wondering if there is, or if it would be possible to create developer tools that are optimized for API stability. No more figuring how to do things the framework-way every several months. Setup once, use forever. When you’re able to minimize the present value amount of time spent maintaining a tool, you’re freeing your future self to work on higher value tasks.

Ruby Gems Tip: Check Your Version

Quick ruby gems tip:

If you are having issues with a gem (and it seems like the issue has been resolved in the github repo), double check your gem version.

Even though I had the latest version of a gem by having [cci]gem ‘leaflet-rails'[/cci] in my Gemfile, the latest version wasn’t bumped up at http://rubygems.org/ (Note: Nothing against leaflet-rails, which is awesome. They’re simply used as a recent, real-life example. )

You can make sure you’re using the latest version of a gem (as it appears on github) by specifying the repo & commit hash:

[cc]gem ‘leaflet-rails’, git: ‘git@github.com:axyjo/leaflet-rails.git’, ref: ‘0f50faaa35d41e8ba24c73c97d265e061b159d81′[/cc]

This will lock the specific commit in place in your Gemfile.lock

Code Reuse

road

I’m reading Sandi Metz’s POODR book, and it is an invaluable resource for becoming a better OO programmer.

While many people are familiar with technical debt (the idea that you cut corners today to ship code today at the expense of the future), Sandi Metz brings up code reuse as another example of code written today that affects the quality of your future code.

From POODR, page 31:

Other programmers will reuse the methods instead of duplicating the code. They will follow the pattern you have established and create small, reusable methods in turn. This coding style propagates itself.

While you should always be striving to write good code, code reuse means that your code sets an example for future developers working in your code base. Your code today acts as a guidebook for future visitors showing what is acceptable practice. Your code patterns today will propagate throughout your future code base.

What does this mean? Well, Captain Obvious, it means the code you write today will impact your future codebase in countless ways.

Github All the Things

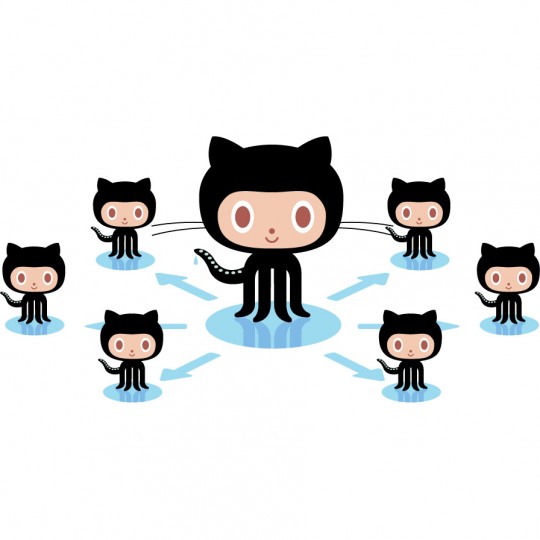
socialite by cameronmcefee (http://octodex.github.com/socialite/)

socialite by cameronmcefee (http://octodex.github.com/socialite/)

As Github continues to take over the world, I wanted to share a couple creative ways Pull Requests have been used.

  1. Job Offer

    In January, Carrot Creative made a job offer via a pull request. When I found out about this at Flatiron School, I was ecstatic for Adam Jonas, and I was wondering if this was Carrot’s standard way giving job offers. Apparently, it’s not standard practice, but it’s awesome nonetheless.

  2. RSVP

    Gust is having a Ruby concurrency talk with José Valim in March. Their RSVP page had a simple message: send us a pull request.

    The instructions were super easy for any developer. Fork their repo, create a file with your contact info, and send them a pull request.

While these could have been handled by e-mail or one of the many channels of communication, using Github to do it is simply cool.

Convert a Ruby Hash into valid JSON

This post is about how to get a valid JSON (JavaScript Object Notation) snippet from a Ruby Hash.

In the world of Ruby, Ruby loves hashes. It’s great because it allows you to access values with keys. With [cci]require ‘json'[/cci], you can easily parse a JSON formatted string into a Ruby hash with [cci]JSON.parse(json_string)[/cci]. You can easily tell hashes by their hash rockets ([cci]=>[/cci]) and JSON by its usage of colons ([cci]:[/cci]).

[cc]
require ‘json’
animal_count = {“tiger”=>3, “lion”=>2, “dog”=>2, “cat”=>3, “mouse”=>1, “bear”=>1, “frog”=>2, “fish”=>1}
animal_count.class #=> Hash
animal_count.methods #=> :to_json
[/cc]

By using [cci]require ‘json'[/cci], you get access to the [cci]to_json[/cci] method on hashes. Unfortunately, they look like this:

[cc]
json_animals = animal_count.to_json #=> “{\”tiger\”:3, \”lion\”:2, \”dog\”:2, \”cat\”:3, \”mouse\”:1, \”bear\”:1, \”frog\”:2, \”fish\”:1}”
json_animals.class #=> String
[/cc]

If you paste the string [cci]”{\”tiger\”:3,\”lion\”:2,\”dog\”:2,\”cat\”:3,[/cci]
[cci]\”mouse\”:1,\”bear\”:1,\”frog\”:2,\”fish\”:1}”[/cci] into JSON Lint, you’ll find that it’s invalid JSON due to a Parse Error.

The backslash character ([cci]\[/cci]) is there to escape the quotes for serialization (Ruby object to transportable string) and deserialization (string to Ruby object).

The good news is that the solution in IRB is extremely easy.

[cc]
puts json_animals #=> {“tiger”:3,”lion”:2,”dog”:2,”cat”:3,”mouse”:1,”bear”:1,”frog”:2,”fish”:1}
[/cc]

With [cci]puts[/cci], the new return String passes JSON Lint as Valid JSON.

Using [cci]puts[/cci] may seem obvious, but it’s the seemingly small things like this that make all the difference in the world. One is properly escaped but invalid, while the other is valid, usable JSON.

(Thanks to Avi for helping me with this @Flatironschool)

How to count Ruby Array items

While working in Ruby, I often find myself trying to get a count of the number of times each item appears in an array. Below, I’ll show you how to create a Hash that iterates through each item in the array and counts the number of occurrences.

We have an array of [cci]animals[/cci] that we want to count.

[cc]animals = [“tiger”,
“tiger”,
“lion”,
“dog”,
“cat”,
“mouse”,
“bear”,
“frog”,
“tiger”,
“lion”,
“frog”,
“fish”,
“cat”,
“dog”,
“cat”
][/cc]
We can count them up by creating a new Hash.

[cc]animal_count = Hash.new(0)[/cc]

Next, we want to iterate through the [cci]animals[/cci] Array and set the [cci]animal_count[/cci] Key as the animal name & the [cci]animal_count[/cci] Value as the counter.

[cc]animals.each { |animal| animal_count[animal] += 1 }[/cc]

For each [cci]animal[/cci] in [cci]animals[/cci], we’ve either created a new Key / Value pair in [cci]animal_count[/cci] or incremented the Value corresponding to the [cci]animal[/cci] Key.
[cc]puts animal_count
#=> {“tiger”=>3, “lion”=>2, “dog”=>2, “cat”=>3, “mouse”=>1, “bear”=>1, “frog”=>2, “fish”=>1} [/cc]

Installing Rails 3 on Windows 7

This post is to document, how I got Ruby on Rails 3 up and running. Each time I have had to install this, (due to my non-technical background) it has been an arduous process. Note that I am reading the free online Rails book as my rails tutorial and I’m using generic Windows 7.

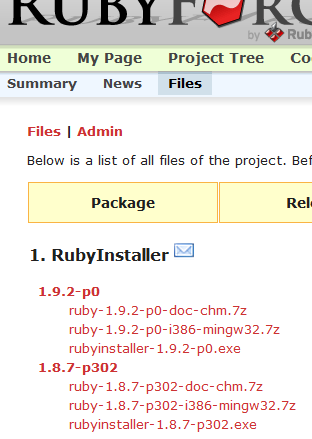
  1. Install Ruby 1.8.7

    I downloaded the .exe file for version 1.8.7-p302.

    
    After googling for a few seconds, I still can’t figure out the difference between: 1.8.7-p302, 1.8.7-p299, and 1.8.7-p249. No matter, moving along now.

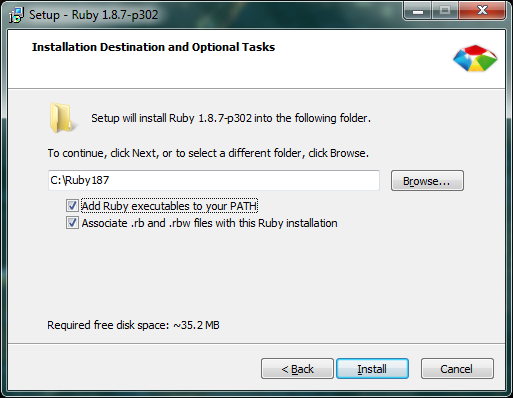
    Run the installer that you downloaded by double clicking on the file.
    I opted to check both of these boxes during the installer:

    When the installation finishes, check the Command Line to verify that Ruby is installed. To get to the Command Line, press the Windows Key, type “cmd” and press Enter.

    Type “ruby -v” and you should get the box below. Ruby is installed.

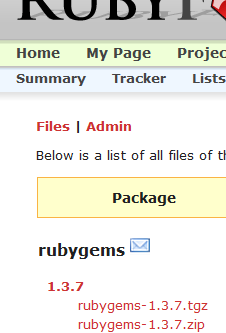
  2. Install RubyGems 1.3.7

    Download the .zip file for version 1.3.7.

    Extract the .zip file and place the the folder “rubygems-1.3.7”  in your Ruby directory. For me, the Ruby directory would be C:/Ruby187/

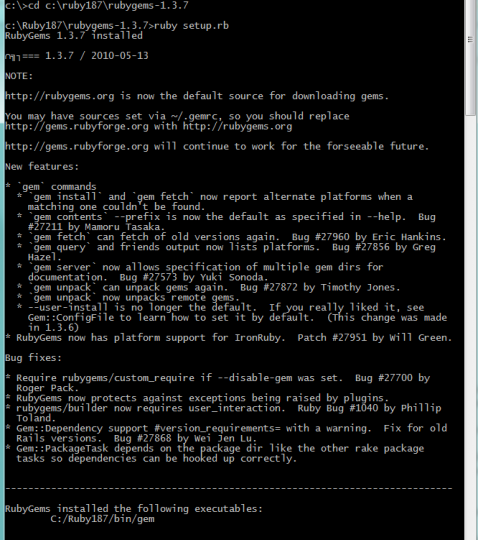
    Open up the command line and navigate to your “rubygems-1.3.7” folder. To change directory, type in “cd” followed by the location. In my screenshot, I typed in “cd C:/ruby187/rubygems-1.3.7/” since the location of my “setup.rb” file was in C:/ruby187/rubygems-1.3.7/

    Type “ruby setup.rb” to install RubyGems

  3. Install Rails

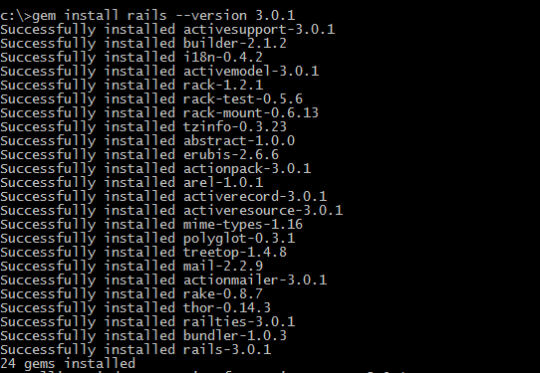
    In the Command Line, type “gem install rails –version 3.0.1”

    When the installation finishes, check the Command Line to verify that Rails  is installed.
    Type “rails -v” and you should get the box below. Rails is installed.

    Congratulations, you’re all RoR’d ups in this place.

  4. Install Git (Optional Step)

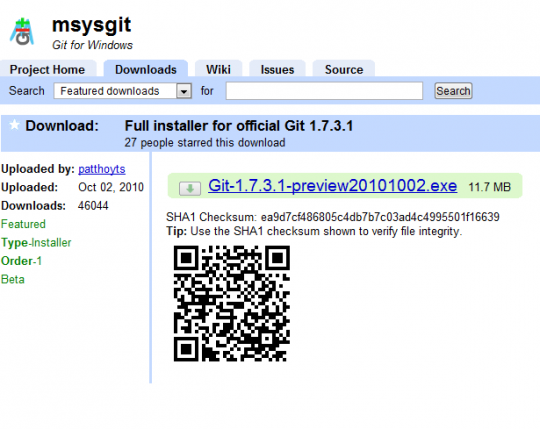
    Grab the latest version of Git. I went with v1.7.3.2. The installer was pretty painless and just involved clicking through the options.

In retrospect, installing Ruby on Rails 3 was not so bad. While I did spend a few hours googling, installing, and documenting the process – the good news is that the process itself is not so bad if you know what files to grab, what to click, and what exactly to type.