Multiplayer Maps

When it comes to a video game, there are many, many components that work together to provide the end user experience. High profile components include the graphics, the characters, and the plot. Details of these components make a big difference in gamefeel. How responsive is the game to player inputs? Does the game feel fair, balanced, and based on player skill?

I want to reminisce about video game maps. Maps are an integral part of the experience and it’s where you probably spend the bulk of your time in game. Map design isn’t as high profile as the character models and weapon choices, but maps are crucial to gameplay balance. Famous maps include Super Mario Bros.’s Level 1-1, Counter-Strike’s Dust2, and League of Legends’s Summoner’s Rift.

Multiplayer maps are interesting in PvP (player vs player) since map updates can rebalance the game over time. New maps in the Starcraft 2 map pool keep the game fresh over time. in a PvE (player vs environment) setting, balance is probably less of an issue since the gameplay is asymmetric.

In no particular order, here are 5 multiplayer maps that I’ve enjoyed (for personal, subjective reasons):

  1. CTF Twin Peaks – Infantry
    infantry
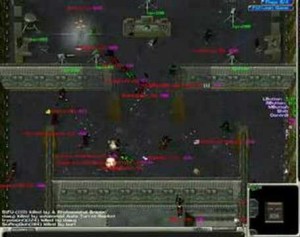
    Twin Peaks is a polarizing map. I spent most of my time in Twin Peaks (instead of maps like Eol, Mechanized Skirmish, etc.) constantly switching between the many available classes. Twin Peaks is a largely open world map, but it’s highly confusing for the newcomer. The teleporting ramps into bases or caves takes a moment to get used to. The map is also huge, since there are hills, bridges, and other outdoor areas where you are going to get sniped. Embrace the chaos of outdoor gun battles or indoor flag capturing.
  2. Big Game Hunters – StarCraft: Brood War
    bgh
    As any StarCraft player knows, economy/macro is king. You want as many minerals & vespene gas as you can get your hands on. BGH is the map for you. If you want to cheese AI or cheese friends, what better map to wall off and build your fleet of carriers on? BGH is not your typical competitive ladder map because of the high abundance of resources. Also, who can forget the happy face in the middle of the map? Genius.
  3. Pipeline – Call of Duty 4: Modern Warfare
    pipeline
    CoD: MW contains many memorable maps for me. I’m picking Pipeline here since it’s a map I can say that I dominated on (in the sparsely populated PS3 communities). There is a decent amount of vertical gameplay in the buildings, but otherwise this map is pretty simple. The gameplay on this map tends to be tightly packed and more close to mid range action. Getting onto the building roof is fun, but you will get easily punished once the other side catches on to it.
  4. Hang ‘Em High – Halo
    hangemhigh
    Halo 1 is well known for its novel gameplay mechanics: only carrying two weapons at a time, regenerating shield + health bar, and more. Hang ‘Em High brings memories since this was an awesome, epic map if you ever had the pleasure to play locally over LAN. Playing this map with CTF is oh so fun since the incredibly overpowered pistol lets you take out whoever’s stealing your flag with ease. In this map, knowing where to find the power-ups (rocket launcher, invisibility, sniper rifle, etc.) is key.
  5. The Secret Cow Level – Diablo II
    cowlevel
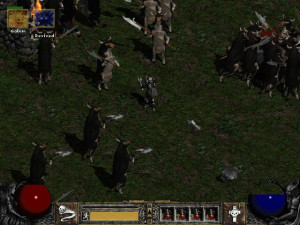
    The cow level in D2/D2X is a farming level to power level your character. The level design itself is pretty basic: an open field with dense packs of cows to kill for easy experience. Playing with strangers online, you had to be careful about people killing The Cow King. Much of my time playing D2X was spent in this map, trying to stay alive or clicking on dropped items.

Anyone who has played these games probably has a ton of memories on these maps – whether positive or negative. Maps provide the context or environment in which games are played. You can’t recall details of a game without thinking about a particular spot on the map where something happened.
WKInterfacePicker Attributes Illustrated

The WatchKit Framework’s WKInterfacePicker has some level of customization in Interface Builder.

As of this time of writing, there are 4 main attributes to configure:

  • Style
  • Focus
  • Indicator
  • Enabled

Style is the most important attribute since it heavily influences the type of Picker. The options for Style are List, Stack, and Sequence. List is the standard iOS-style 3d list of text. Stack allows you to flip through images as if it were a deck of cards. Sequence lets you move between images without any intermediate transition effect. For a good look, I’d recommend Big Nerd Ranch’s blog post.

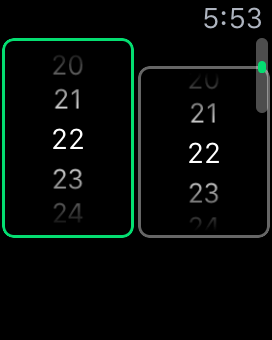
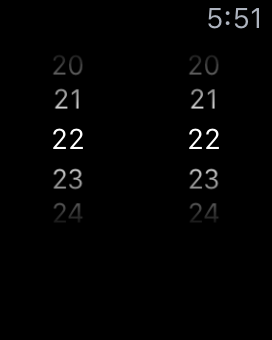
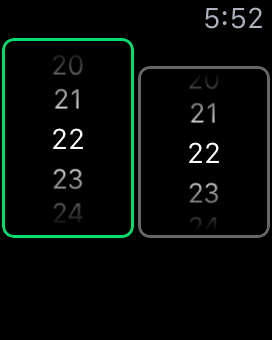
Focus presents an outline around the currently focused/selected Picker. This is helpful if you have multiple WatchKit pickers or multiple elements for selection (think “Customize” for your watch face). The options are None, Outline, and Outline with Caption. The last option, “Outline with Caption”, comes into effect if your Style is Stack (or possibly Sequence), see an example here.


Plain, without focus

Plain, without focus

Left picker is focused

Left picker is focused

Indicator has two options: Disabled or Shown While Focused. The documentation wasn’t very clear: “A value indicating whether the picker uses an indicator to convey context about the number of picker items and which item is selected.” As far as I can tell, Disabled means the standard look, and the “Shown While Focused” adds a scroll bar helper on the right side of the watch.

Indicator - Shown While Focused

Indicator – Shown While Focused

Enabled is a helpful option that is either on or off. Enabling it or not doesn’t affect the view. When the picker is enabled, it allows the user to use the picker. This attribute can be set or unset programmatically with -setEnabled.

Hopefully this quick explanation of the different WKInterfacePicker attributes helps you out. The digital crown (AKA dial) & the WKInterfacePicker provides an extremely powerful, convenient input method for your watch app users.

Logging during development with Apple Watch hardware

Inserting breakpoints or logging statements (such as NSLog) is relatively straightforward with an iPhone-only iOS app. But how do you log from the WatchKit Extension (aka Watch app)?

The good news is that logging isn’t filled with many complicated steps. The bad news is that the logging works intermittently.

  1. Add your NSLog statements in your WatchKit Extension. This is probably your InterfaceController.m
  2. Run the watch app on iOS Device + watchOS Device (in the WatchKit App scheme)
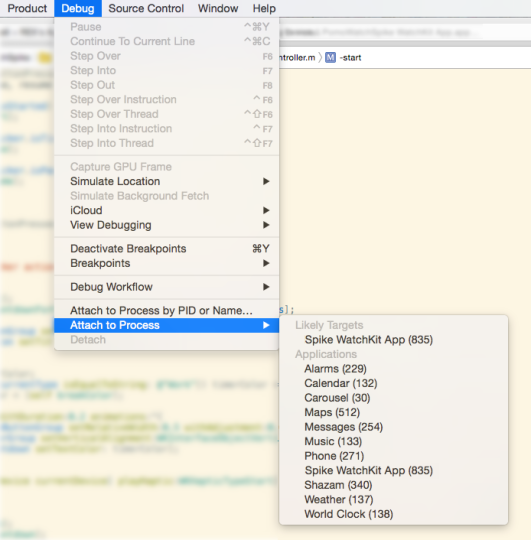
  3. Select Debug > Attach to Process > (click on your watch app name)
  4. Profit! You should see your NSLogs when they are triggered in the app lifecycle in Xcode

debug

If logging isn’t working, try typical Xcode debug steps such as:

  • deleting the app on your phone & re-running it in Xcode
  • restarting the phone and/or watch devices
  • clean Xcode (cmd + shift + k) and re-run the app
  • quit & restart Xcode

Xcode Fix Code Sign error: No matching provisioning profiles found

While updating my pomodoro apple watch app, I ran into an issue building my app with the latest Xcode (v6.4). The error was:

Code Sign error: No matching provisioning profiles found: None of the valid provisioning profiles include the devices:
iPhone6
CodeSign error: code signing is required for product type ‘WatchKit App’ in SDK ‘iOS 8.4’

First, I double-checked that my device was registered by UDID in the Apple Developer portal under Devices > iPhone. My code sign error persisted, so I created a new profile under Provisioning Profiles > Development.

  • Under Provisioning Profiles > Development, click on the + sign at the top right
  • Select iOS App Development and hit continue
  • Select the App ID that corresponds to your xcode project and hit continue
  • Give the Provisioning Profile a descriptive name and hit continue
  • Download your profile. It ends in a .mobileprovision extension
  • Double-click on your .mobileprovision file
  • Let Xcode build your project again (and success!)

Debugging Xcode is scary since the error messages are not very helpful. Also, it’s easy to get confused looking in the Apple Developer Portal versus iTunes Connect.


Travel tip: Learn to drive manual

I recently spent time traveling in Europe.

As an American, driving an automatic car is the default since most cars are purchased automatic. Many people in the USA don’t know how to drive manual (or stick).

You will save yourself a bunch of money if you know how to drive manual and you’re renting a car in Europe. In Europe, manual cars are the norm and automatic cars are considered luxury (more expensive).

Apple GameCenter Implementation Strategy

Having worked on my first app that implements GameCenter, I had a lot of questions about the process. The main question was how do I implement GameCenter into my app? Do I need to pick the right application template when creating my Xcode project? Do I need to use SpriteKit? Etc

The good news is that GameCenter can be added on after the rest of your application is ready. You should focus on your game mechanics, game engine, user friendliness, etc. After you are satisfied with the core experience, you can add GameCenter (leaderboard, achievements, and other features) afterwards. You can choose any application template and you don’t have to use SpriteKit.

In my app, I had both a phone app & a watch app. You will need to implement GameCenter using Apple’s GameKit Framework. GameKit is currently only for the iPhone, so GameCenter logic needs to be called in the Phone app.

I found great Apple documentation with the same advice:

Here’s a reasonable process to follow when designing a game that supports Game Center:

  1. Decide which Game Center features you plan to support.
  2. Define your game mechanics, keeping in mind the requirements and limitations of Game Center.
  3. Implement your game engine, ignoring Game Center for now. Focus on developing the other aspects of your game, such as your game engine and gameplay. You do this to avoid needing to create an iTunes Connect record earlier than you need to.
  4. [implement Game Center]

As with any app, focus on nailing the key user experience. Then worry about implementing/integrating GameCenter in your app.

Setup Apple Watch for Development Guide

While working in Xcode and running my watch app on my actual hardware watch for the first time, I ran into this error on my watch the first time: “Failed to install [app], error: Application Verification Failed.” This stack overflow answer provides the solution, but I wanted help illustrate the steps I took to fix the error. Disclaimer: this worked for me, but there are probably more optimal ways of fixing the error.

  1. In Xcode, get the UDID of your Apple Watch (WIndow > Devices). The UDID is labeled “Identifier” and you can double click on the Identifier device hash to select & copy it.
    1
  2. Visit the Apple Developer Portal at https://developer.apple.com/devcenter/ios/index.action and click on “Certificates, Identifiers & Profiles” in the right sidebar.
    2
  3. Click on Devices > All in the left sidebar.
    3
  4. Click on the Plus Sign (+) in the top right.
    4
  5. In Register Device, provide a Name (whatever you want) and your watch UDID (from step 1 above).
    5
  6. Submit the form to register your watch device.
  7. In “Certificates, Identifiers & Profiles”, locate your .watchkitextension Provisioning Profile for your app. Select & download this profile.
    7
  8. Locate your downloaded profile file on your computer & double click the Provisioning Profile.
  9. Restart Xcode.
  10. Build your project and you will encounter a iOS Development Certificate alert.
    10
  11. Warning, this step may be dangerous (proceed at your own risk). This worked for me. Click on “Revoke and Request”. This will revoke your current certificate and request a new one. You will probably get an email notifying you that “Your Certificate Has Been Revoked”.
  12. Run your Xcode project. Your watch app should now load the development build on your actual watch hardware.

About the author: Rex Feng enjoys iOS development and has released Pomodoro Pro for the iPhone & Apple Watch. You can follow him @rexfeng.

Pomodoro Pro WatchKit Architecture

My iOS app, Pomodoro Pro, is a constant work in progress. This post discusses how Apple Watch support was added to v1.1.0. Pomodoro Pro is a free, easy to use app for getting work done in continuous work & break cycles.

If you’ve looked into Apple Watch development, you’ve learned that the watch portion is an extension of your phone app. Your phone app is the brains of the operation, and your watch app relies on the phone app to do anything.

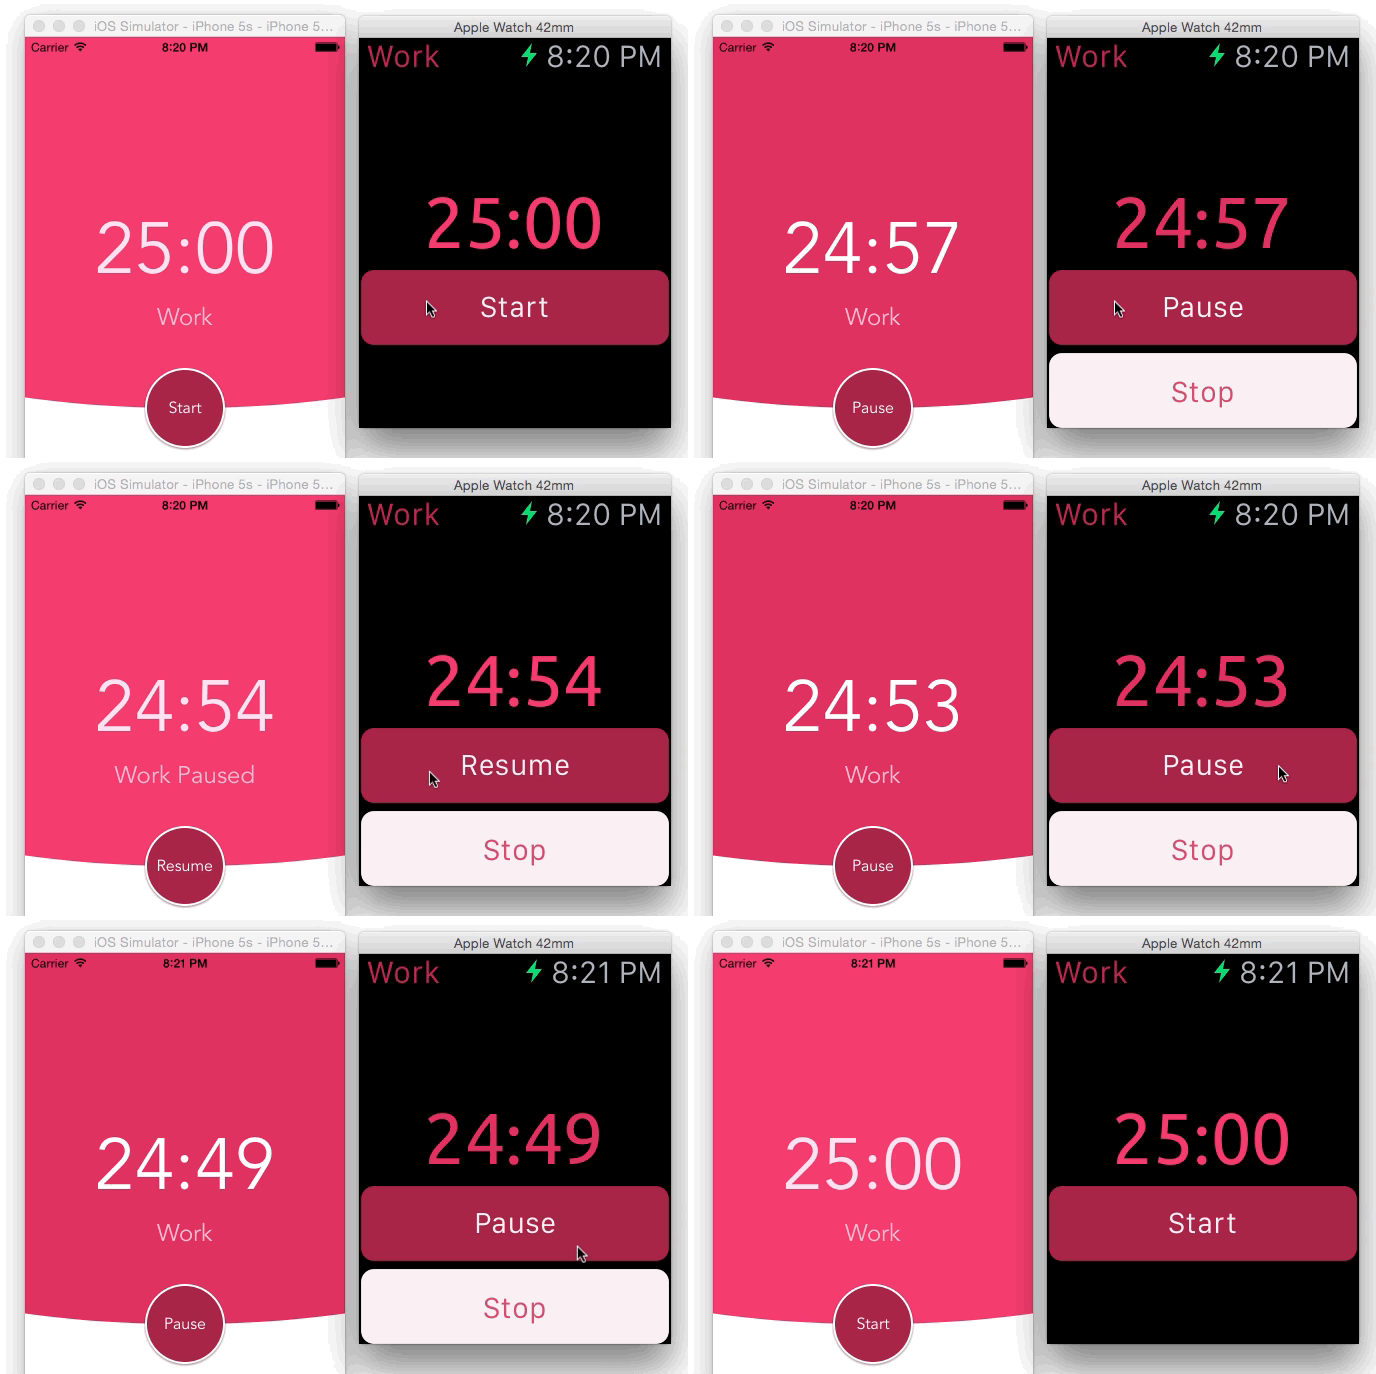
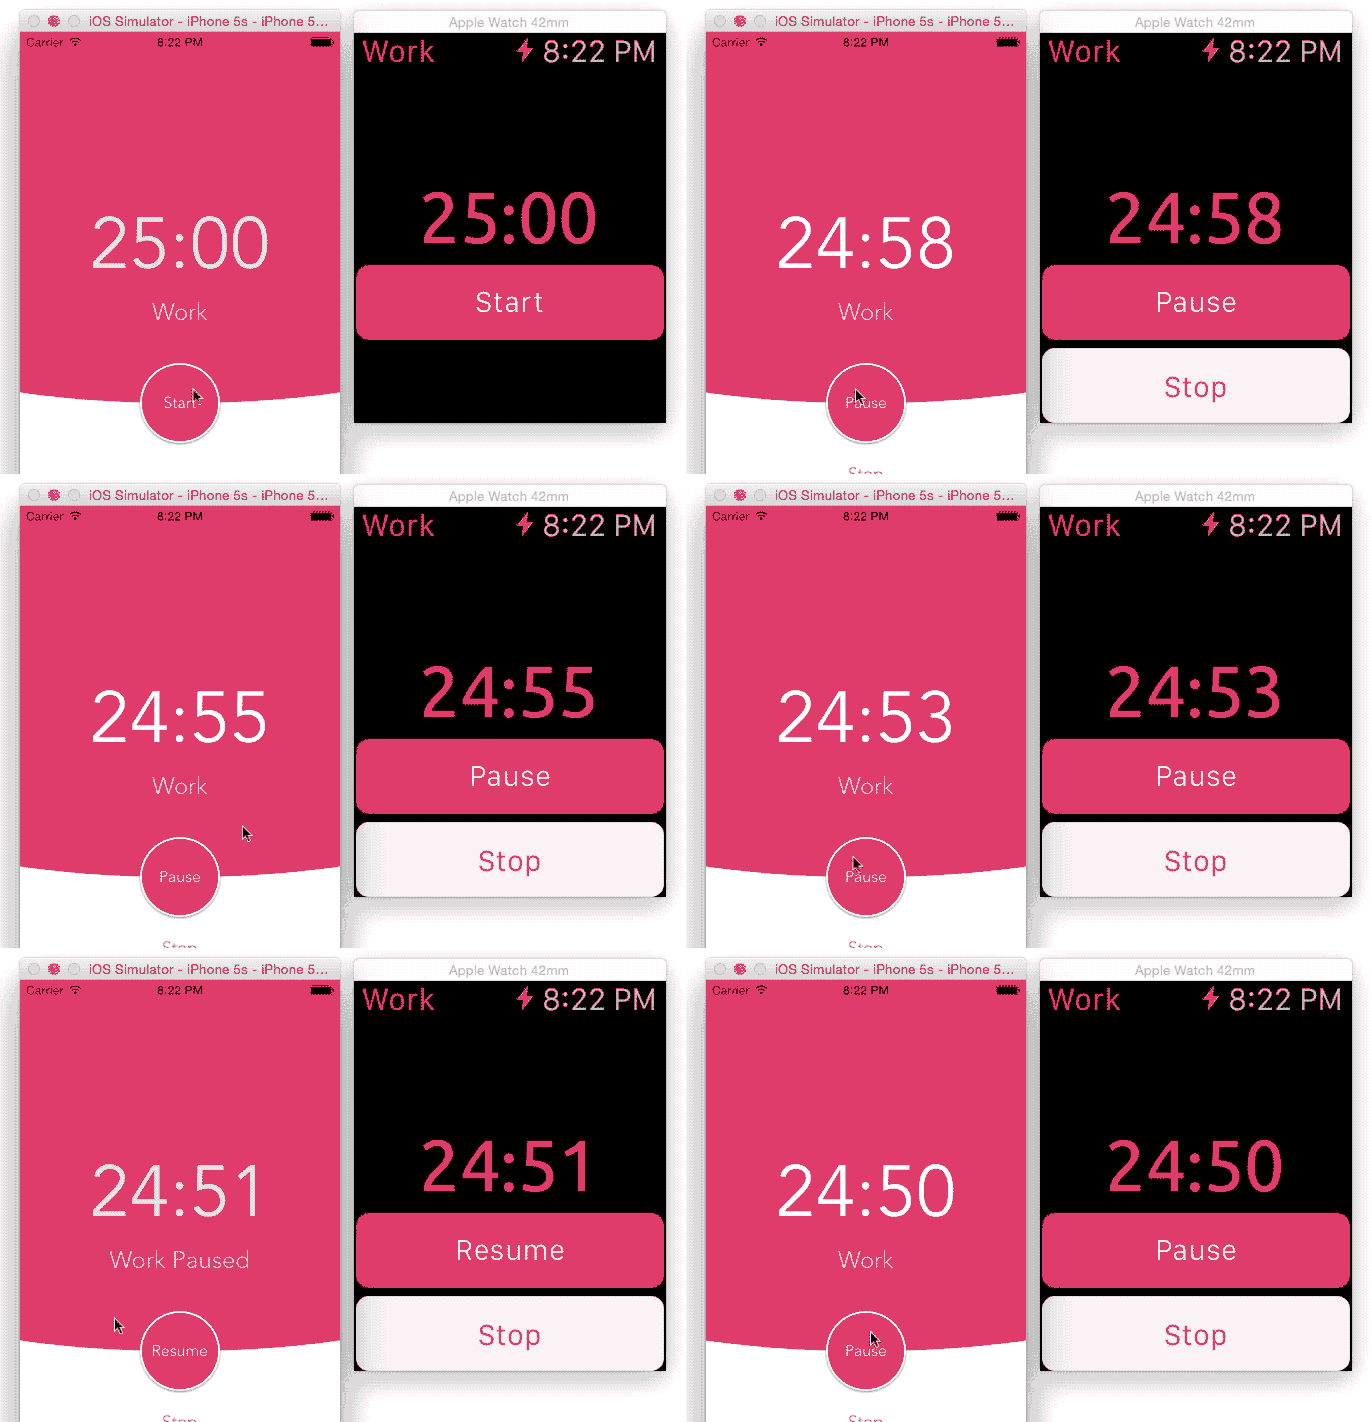
2 Way Event Binding Demo

From watch to phone

watch-final

From phone to watch

phone_8

App Lifecycle

With mobile development, it’s necessary to understand when a user will come into contact with your application. If the user comes across your application and starts using it when the visuals are incorrect, the user will lose confidence and not trust your application.

Working with Xcode and the watch simulator, my app has the following key lifecycle events:

  • watch starts up
  • watch resumes
  • watch actions (button presses) are reflected on both the watch & phone
  • phone actions (button presses) are reflected on both the phone & watch

Each of these events are essential for maintaining a consistent user experience that does not surprise the user.

Implementation

My implementation used MMWormhole for 2 way event binding. This means that the phone should know when a button was pressed on the watch and vice versa. Curtis Herbert has a great blog post on sharing data and events.

In order to have the phone app be responsible for the correct timer state, my phone app is responsible for returning a NSDictionary of the current timer properties. My watch app is able to get the NSDictionary and update the watch screen accordingly. It is important to note that my phone app is the ONLY source of the canonical current timer state. Trying to sync state between the phone and watch app would be a nightmare and a lot of work.

When the watch app starts, the watch app asks the phone for the current timer state (a NSDictionary) in order to set itself up correctly. When the watch app resumes from inactivity, it also asks the phone for the current timer state (a NSDictionary).

Using MMWormhole, I’m able to listen on events from the watch or the phone. When the user presses a button on the watch, the watch app passes a message to notify the phone, and the phone updates the timer state. Similarly, when the user presses a button on the phone, the phone app updates the timer state and notifies the watch app with the latest state.

Lessons Learned

  1. The phone app (not the watch app) is responsible for the correct state
  2. Use a Framework or shared classes (in File Inspector, add Target Membership) to DRY (don’t repeat yourself) out your codebase

Summary

With Pomodoro Pro, it was essential for a user to be able to start / pause / resume / stop the timer from either the phone app or the watch app. This required a way to manage the timer state (phone app) and have user actions occur on all screens (phone & watch).

In order to build a user friendly watch app, you should anticipate & identify where your app’s state and events come from. Make sure to account for those scenarios.

Pomodoro Pro v1.1.0 went live on 4/14/2015. Please let me know what you think @rexfeng

Fix no matching provisioning profiles validation issue

Here’s a quick problem & solution that worked for me. Hopefully this helps others out there.

Situation:

Validating an archive prior to submitting the build to the App Store, but it fails validation. I am using App Groups (for the phone app & watch app).

Problem:

Validating my archive created two “no matching provisioning profiles found” errors. The error was specifically related to “none of the valid provisioning profiles allowed the specified entitlements betareports-active com.apple.security.application-groups”.

Solution:

In my case, my development was able to use App Groups, but the production/distribution environment was not setup yet.

Under Provisioning Profiles > Distribution (https://developer.apple.com/account/ios/profile/), create an Distribution / App Store for each App ID that you need. In my case, I had to create one for the phone app & one for the watchkit extension. Make sure to download each after generating them. Double click on your downloaded files to automatically load them into Xcode.

When I tried to validate my archive again, I was able to successfully validate (after generating & loading my new Provisioning Profiles).

Optimizing for stable tools that don’t create perpetual work

Time is an incredibly important asset.

I come from a Ruby on Rails background. The progress of Rails updates & JS frameworks has been amazing & constant. Each new Rails patch brings with it some work to stay current. It’s not Rails’s fault since there are always new features or security issues that arise. Having a well maintained framework, such as Rails, is a huge boon for the community.

With any programmer tool, you generally want to be on the current stable release (for a variety of reasons including security & bug fixes). The issue is that upgrading to the latest stable version creates a never ending stream of (hopefully small) work.

Even if you went without a framework (Rails, Django, etc.), your server is running on a suite of tools. You’ll need to keep your OS (even LTS) and most likely nginx up to date.

Perhaps you want to outsource server maintenance, so you’re using Heroku. You’ll have to keep your configs compliant with the Heroku deployment framework & best practices.

What I’m getting at is that there are so many incredible tools available to developers today. Oftentimes, these tools are free and constantly get better & faster over time.

I’m wondering if there is, or if it would be possible to create developer tools that are optimized for API stability. No more figuring how to do things the framework-way every several months. Setup once, use forever. When you’re able to minimize the present value amount of time spent maintaining a tool, you’re freeing your future self to work on higher value tasks.